
Deploying Registry Keys via GPO
Writing an install.sh. Scaling a LAMP install.
05/18/2021Introduction to PowerShell: Getting Started with the Basics
01/10/2022When working as a System Administrator you will often need to deploy one or more Registry Keys in your environment. The easiest way of doing this is by Deploying Registry Keys via GPO.
GPO or the Group Policy Editor is a Windows system-administration tool that empowers administrators to configure many important settings on their computers, servers, or networks. Furthermore, administrators can configure password requirements. They can also configure startup programs, and even define what applications or settings users have access to. This includes modifying the registry. Regardless of the reason, a Group Policy Object is one of the best ways to deploy many changes across an Active Directory Domain.
Deploying Registry Keys via GPO is on the easier side of the difficulty spectrum. In the below setup we are walking through setting a new registry key on specific VM servers. By adding the key:
HKEY_LOCAL_MACHINE\SYSTEM\CurrentControlSet\Services\Tcpip\Parameters\ArpRetryCount with a DWORD "0" (Zero).
No administrator wants to login to each server, load regedit and make changes, then restart. We can let GPO take care of the implementation and the next natural restart will update the systems with the new registry key.
Deploying Registry Keys via GPO
To start open the Group Policy Management dialogue box and create a new Group Policy Object.
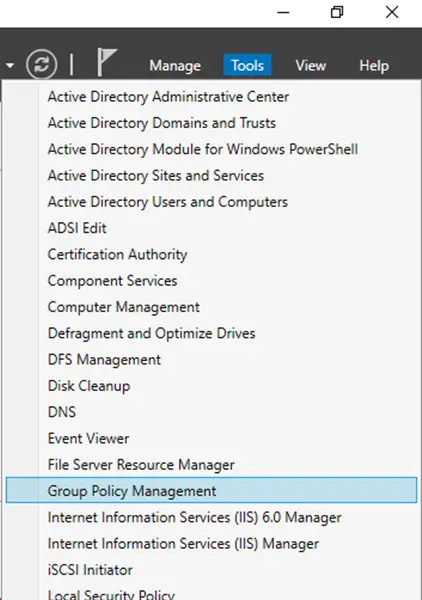
In Server Manager, Click on Tools, then Group Policy Management.
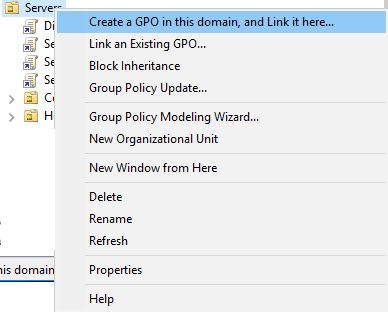
In the Group Policy Management Dialog box, Right Click on the OU you want to build the new GPO in and give it a name.
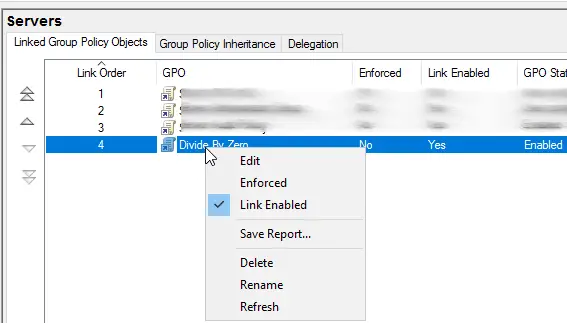
Now that the GPO was created we can edit it. Right click on the newly created GPO and left click on Edit.
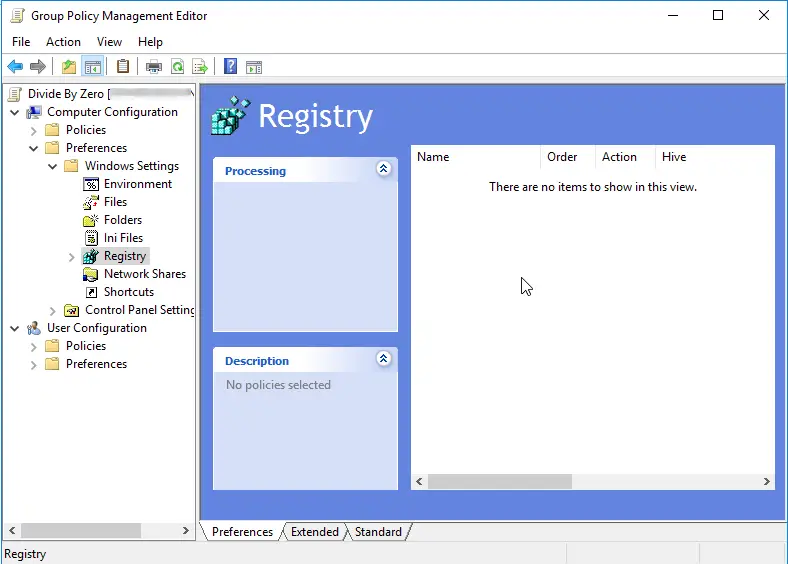
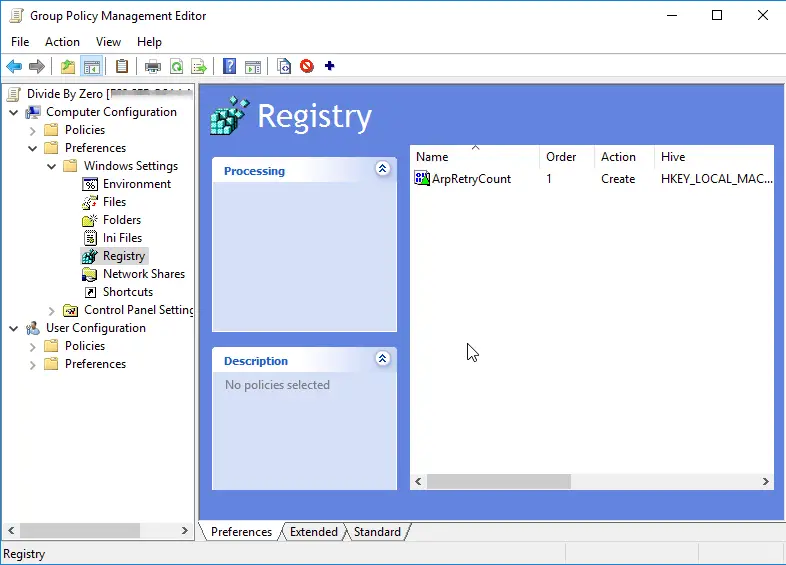
Within the Group Policy Management Editor Dialogue Box drill down on Computer Configuration. Then drill down on Preferences. Continue to drill down on Windows Settings. Lastly select Registry.
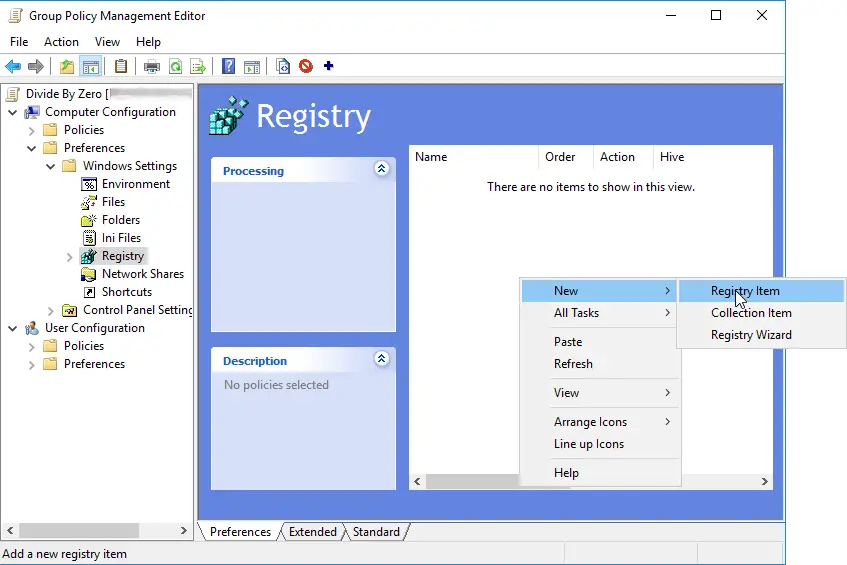
Right Click inside the Registry area that is blank and select New
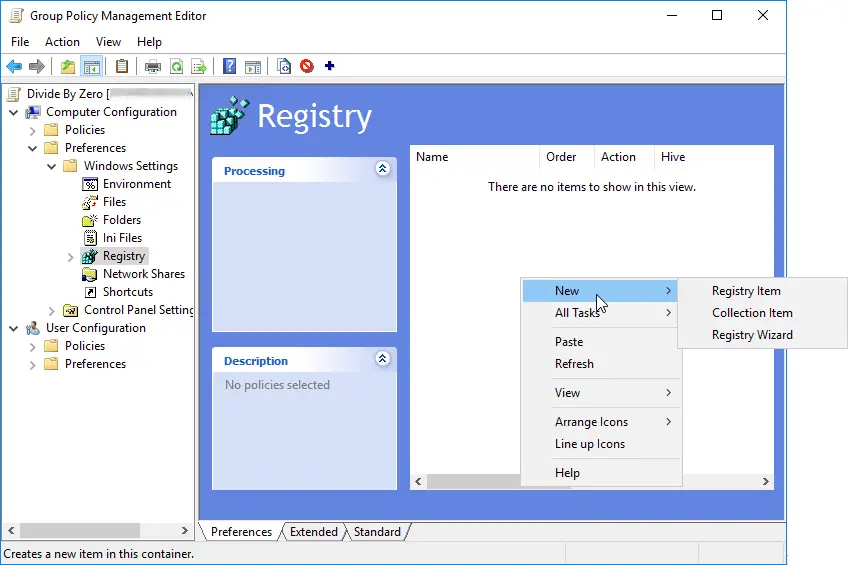
Next select Registry Item to continue.
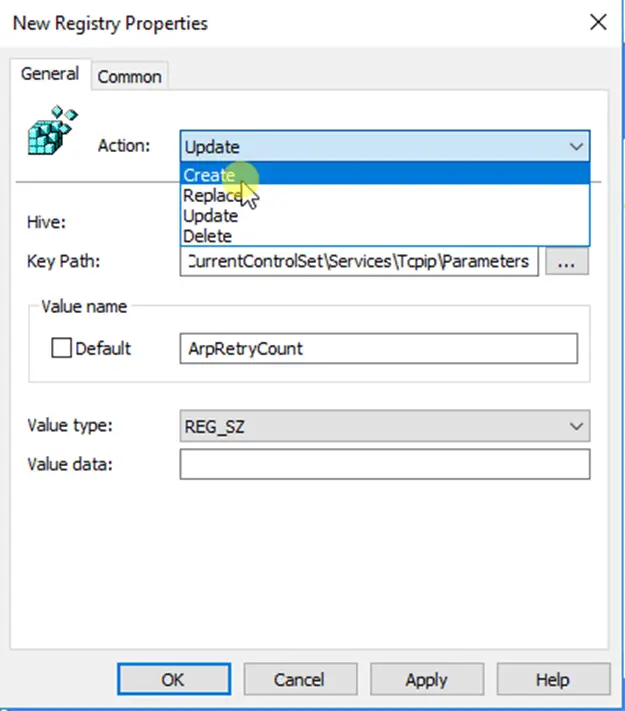
Within the New Registry Properties Window we will add our details.
New Registry Properties
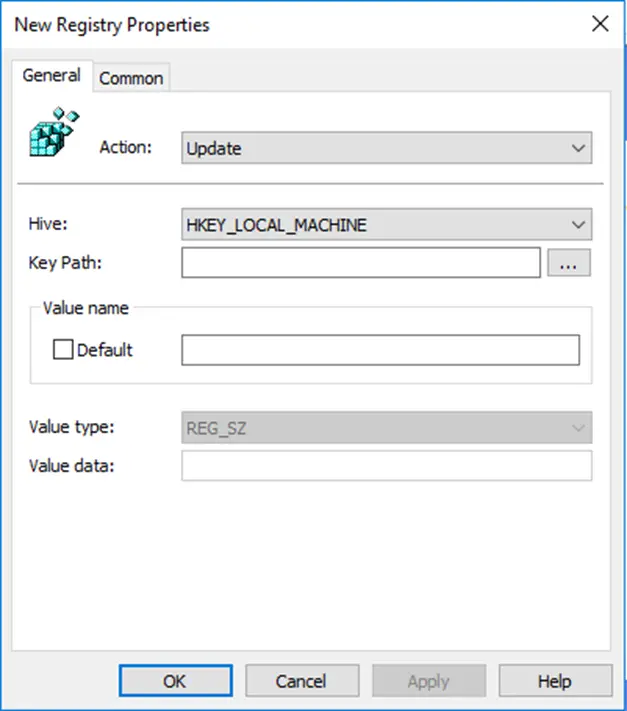
Now we get into adding the specific key information. To do that select the Hive. HKEY_LOCAL_MACHINE is where we need to start.

Just as the above image, for Key Path: Enter the remaining portion of the path that is currently valid:
\CurrentControlSet\Services\Tcpip\Parameters\
Now we add the Value name ArpRetryCount to the Value name.
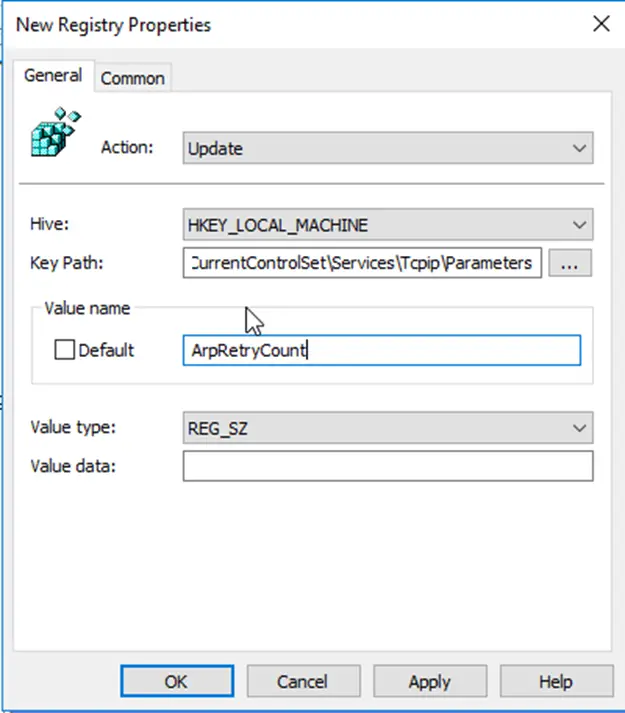
Next we need to change the Action: to Create from the default Update. Click on Create.
We set the Value Type for this specific registry key is a REG_DWORD.
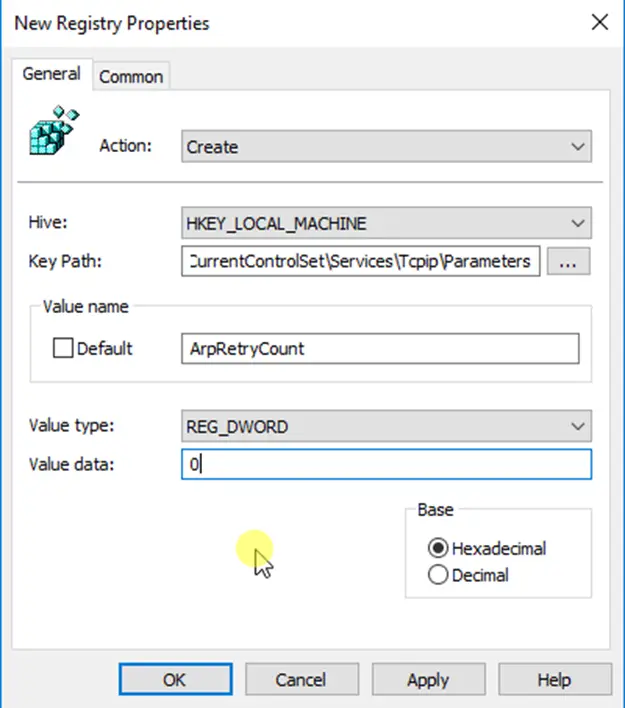
Lastly, for this Registry Key the Base is Hexadecimal, and the value is 0.
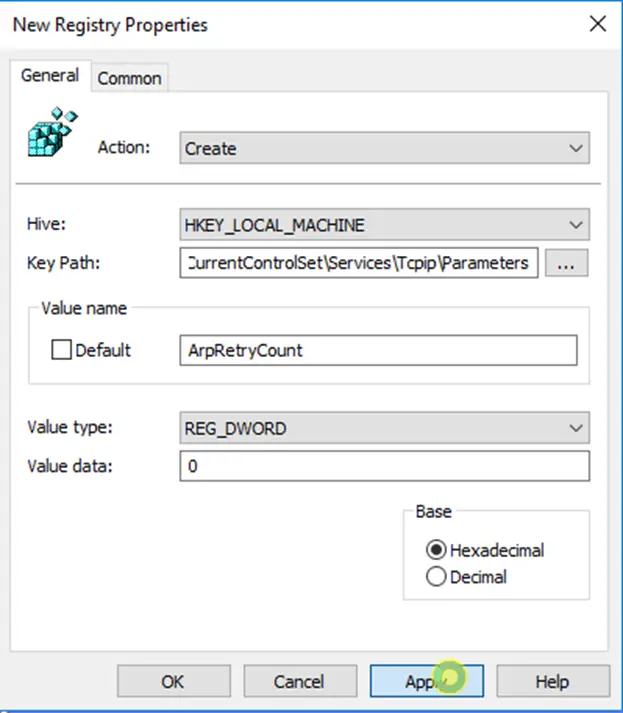
Click Apply to save changes.
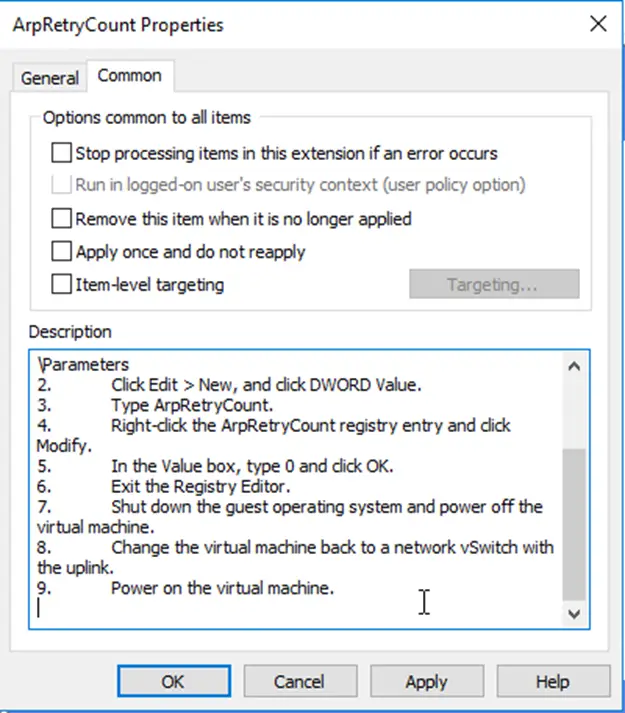
In the next screenshot no settings under the Common tab need changed. However, I do add a description to all GPOs to make it easier to understand what is being done in this GPO change.
Click Apply to save. Then click OK, to close.
Now we are done. The new Registry GPO is completed and will update as the regular interval of GPO’s update on clients.

